Well hello there, I assume you are reading this because you've purchased the Maynard Dress - so thank you! I hope you enjoy the process of making up a zero-waste dress.
This blog post is to supplement the instructions provided with the pattern - please make sure you've read the instructions carefully before starting!
If you haven't already purchased the pattern - you can get it here.
Let's do this.
Follow the Printing and Assembling document within the pattern files to help you get your paper pattern together.
I've used the two A0 copy shop files, which still require assembling at the grey border line. Once the pattern has been assembled, you will need to cut around the outside border only.

Make sure you have pre-washed and pressed your fabric. Fold the length of the fabric in half so the wrong sides are facing together.

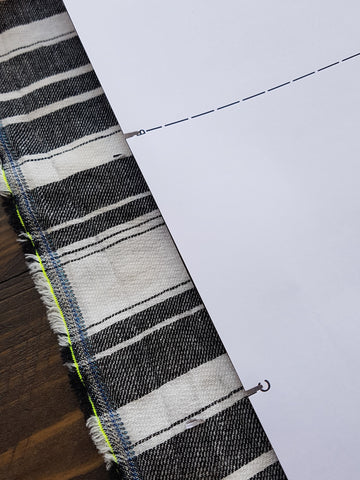
Place the entire pattern piece on top of the fabric, matching the folded edge of the fabric with the side of the pattern marked 'Place on Fold'.

If you have a pattern notcher, I find it handy to cut notches in the paper pattern. It's not a necessary step, but I think it's easier to mark the notches with chalk on the fabric if the pattern has a cut away notch.
Transfer the notch markings to the fabric using chalk or a fabric pen.


This is not a necessary step, but I've cut away the strap pieces to allow me better access to the notch markings of the other pattern pieces.

Use an awl to poke holes in the paper pattern at the points where lines intersect or change direction. I've misplaced my awl, so I just used a sharpened pencil - anything sharp or pointy will work. Mark the fabric with chalk or fabric pen through these points.


Work in sections to draw the lines of the pattern onto the fabric. You'll be drawing lines between the marked holes and notches, according to the pattern. Place a pattern weight on one half of the pattern and fold the other half back to keep it all in check/as a point of reference. Use a ruler to keep these lines straight.

You only need to mark the solid lines - no need to mark the dashed lines that indicate fold or stitch lines. Once all the solid lines have been marked, you can cut them out.
All the lines, except one, are to be cut through both layers of fabric.
You'll notice on the pattern, that the left side of the godet is the only line that is to be cut through the single, top layer of fabric.


Snip into any internal notches marked.

Cut the pocket pieces in half at the fold line. Do this for the straps as well.

If the process of marking the notches got a bit too confusing (which it still can for me - even though I've made this dress SO MANY TIMES), I like to place the fabric pieces on the corresponding paper pattern piece to check I've got everything/mark the ones I've missed. The front pieces have different notches for the right front and the left front. Pictured below is the right front.


And this is the left front.


Once all the notches have been marked with little snips into the fabric, flip the fabric to the wrong side and transfer the markings using chalk or fabric pen. This step may seem fiddly and time consuming, but trust me - it's necessary. Extend the markings horizontally for 4cm or more. Because the edges of these pieces are finished with a double turned hem, any smaller markings will get lost within the folds and just prove to be a nightmare later when you are assembling the pieces together.


Transfer any marker points to the fabric as well. You can skip the pocket placement ones if you like - these are just a guide and I found most people preferred to determine this placement once the garment was made up and tried on.

That's it! You're ready to sew. I'll be posting a sew-along blog for anyone who'd like extra visuals to complement the instructions that come with the pattern. I'll update this post with a link once it's ready!
Feel free to shoot me an email if you have any further questions or comments.
I can't wait to see your makes.
Tag me on Instagram - elbe_textiles - use the hashtags #maynarddress and #elbetextiles so I can see your progress shots and finished items.
I’m 5’2", any advice on which pattern pieces to shorten and where? Thanks!
I so want to make this. Love the look and looks easy, maybe. But I do love the idea of using all the fabric.
Hey Ellena, I wish I could remember where I got this chalk/what the brand is. All I know is that there is a bunny imprinted on the chalk (in case that rings any bells for brand names). I know you can buy tailors chalk at Spotlight, Lincraft, any of the main fabric stores.
What’s the yellow fabric marker you use?